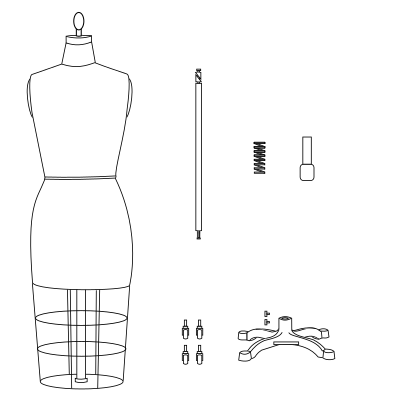
Important: please see our Troubleshooting Page for more up to date PDF and videos of the dress form assembly process
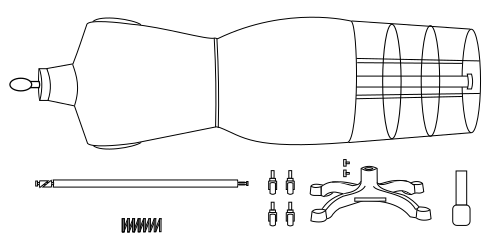
step 1.
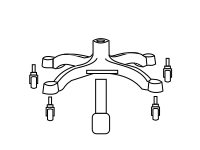
Install all four castors (wheels) by clicking them into the four holes underneath the base.
Slide the pedal into the base so that the center of the pedal rests on the small bar and the end of the pedal is squarely underneath the base.
step 2.
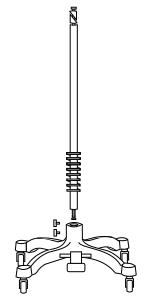
Slide the spring through the pole and insert the pole into the hole of the base. The bottom of the pole should pass through the hole of the base and rest on the end of the base pedal. The pole then needs to be secured tightly to the base by tightening both of the included t-screws for the base.
Please see this PDF for more information on properly installing the pole.
The spring should be resting on the top of the base.
step 3

When the pole is at rest the tension of the pole should be causing the twin triangles on the top of the base to expand. Once the pole is securely fastened to the base, depressing the base pedal should release this tension (of the twin triangle section on the top of the pole) allowing the torso to be slid onto the pole (this step might require a second person to help). Once the torso is at your desired height release the pedal (which will cause the triangles to expand and will hold the torso in place).
To adjust the height of the torso at any time, simply depress the pedal, set the form at the desired height and release the pedal.
step 3.1

(optional) For use with very heavy garments (or if you ever find the pole loosening throughout the life of your TSC form), the pole's tension can be tightened. To do you would need two wrenches. One wrench should be used to hold the nut at the top of the pole (above the triangle section) in place while the second wrench is used to twist the nut at the bottom clockwise. The farther up the pole this bottom nut is screwed on, the stronger the pole's tension will be.
