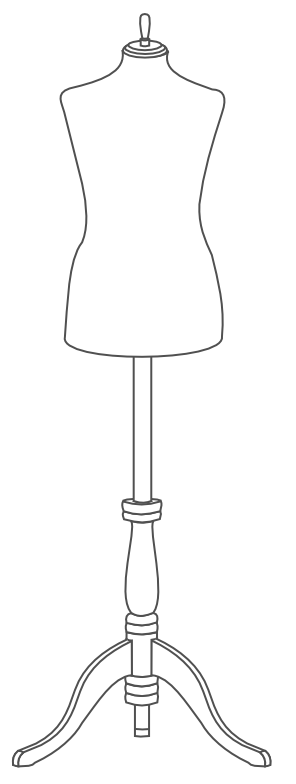
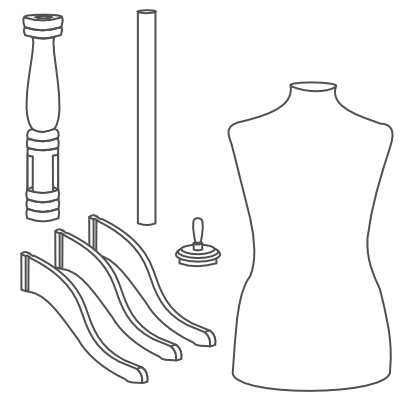
step 1.

Use a Phillips screwdriver (not provided) to remove the screw at the bottom of the tripod center. This should separate the bottom section from the top.
step 2.
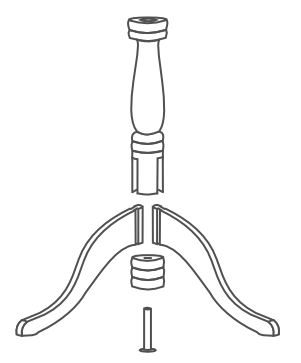
Once the bottom piece of the center is removed, there should be three groves revealed at the underside of the top part. Slide each of the three legs into these grooves and secure them in place by reattaching the bottom part to the top using the removed screw.
step 3.
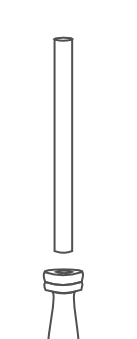
Slip the metal bar into the socket at the center of the top the tripod.
Note: Occasionally, the hole is sometimes slightly larger than the pole which would cause the pole to wobble. To prevent this, insert a small slip of paper or the like into the hole while the pole is being inserted. Once the pole is secured, any additional paper sticking out of the hole can be removed.
step 4.
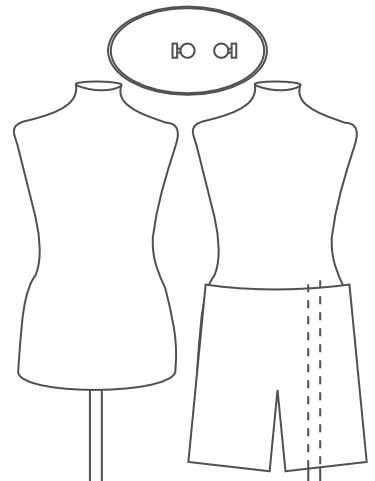
The body of the dress form can be attached to the pole either from the center or from the side. Generally, the dress form is attached at the center as this is where it is most stable. Should you wish to display pants/ trousers on the form, the pole should be inserted through the side hole (after, of course, the dress form is wearing the pants/ trousers).
The height of the dress form can be adjusted by raising and then tightening the top pole.
step 5.
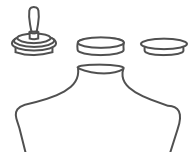
The cap is attached on top of the neck of the dress form by either securing in inside the neck hole or over the neck hole, depending on the type of the cap you had ordered.
Note: For reasons beyond our control, some of the caps might be unequally sized - resulting in a difficult fit. Generally, this issue can be completely resolved by gently squeezing the neck and applying slight pressure when attaching the cap. Should it prove to be too difficult, please contact us and we will gladly send you a replacement.